Find the right nanodegree program for you.
Swift is the hot new programming language introduced by Apple at WWDC [World Wide Developer Conference] 2014. Meant to succeed Objective-C as the primary language used for iOS and OS X development, Swift was designed to be modern, safe, and fast. Coincidentally, it’s also the language used in our iOS Developer Nanodegree.
This piece will get you started writing Swift code, introducing you to the very basic syntactical elements of the language, from declaring variables to printing to a terminal. You can follow along with these elements using Playgrounds, but first you’ll need to download Xcode.
Introducing Playgrounds
Xcode is a free download, but it does require a Mac computer running OS X 10.9 or later. Download it from the App Store! It’s a large download, and may take some time to complete.
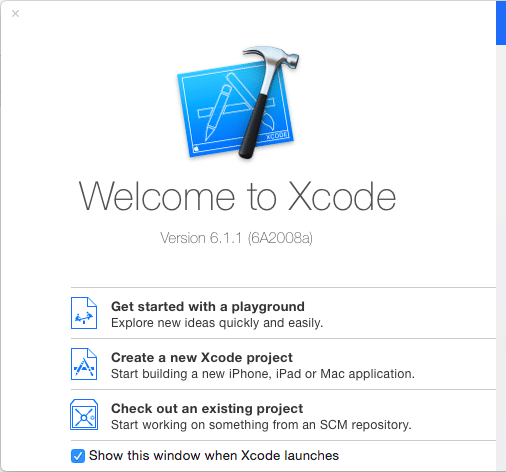
Once downloaded, open Xcode and select “Get started with a playground.”
Playgrounds were released with Swift, and are designed to be a place to experiment with code. By providing real-time code results, it’s a great way to “see” what your code is doing and familiarize yourself with the language. Plus, according to the default comment by Apple, it’s a place to play! Yay! Who doesn’t want to play with code?
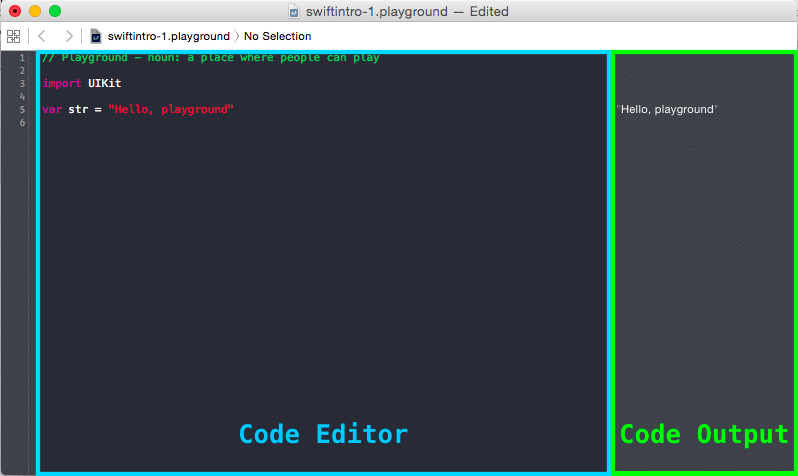
Your first program should open with some very simple code. The right-hand pane displays the results of the code entered on the left. Note that in the default code, the contents of the variable str is displayed on the right. If you change that value, the output on the right will also change.
You might have noticed that my editor is different from the default. That’s because I changed the theme of my playground. You can do the same by going to Xcode > Preferences > Fonts & Colors.
Swift Fundamentals
Now that we’ve got the basics of Playgrounds down, and have modified our editor appearance to our liking, let’s take look at how to accomplish some basic coding tasks in Swift.
Variables and Constants
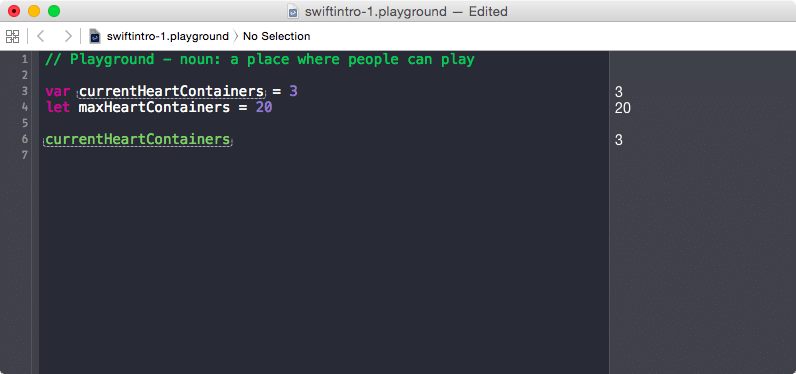
Variables are declared using the keyword var, like so:
var currentHeartContainers = 3
Constants are declared using the keyword let.
let maxHeartContainers = 20
Notice that our code results screen always displays the value of each variable. So, if we called currentHeartContainers again, we’ll see a value of 3 on the right-hand side.
Fun fact: Variable names can actually be any Unicode character! That means you can use emojis, hanzi, katakana, anything! It’s as easy as the following:
Variable Types
Without using type annotations, Swift infers a variable’s type. However, if you want to be explicit about the type of value a variable can store, you can append your variable declaration with “: <variable type>”. As an example, here we declare a string:
var naviAttention: String = "Hey!"
And if I wanted to add to that string:
Other variable types that you can declare include:
- Int: 32 or 64-bit integer (dependent on platform)
- Float: 32-bit floating point number
- Double: 64-bit floating point number
- Bool: true or false
Printing
You can print to the console using println(). It’s a little redundant in a playground, since the output is always shown on the right, but you’ll want to know the keyword when you’re developing iOS apps. As a simple example: println(“It’s dangerous to go alone. Take this!”).
You can also use string interpolation like so:
Comments
Now what good would this article be if we didn’t leave you with ways to comment your code?
// This is a single line comment.
/* This is how you write…
ALL THE COMMENTS!
Srsly, all of them. */
Tips & Tricks
Before we ride off into the sunset today, here are some helpful features of Swift that may make it easier to write your code!
#1: Declare multiple variables on a single line with commas.
#2: Combine commands on multiple lines using semicolons.
#3: Access the emoji keyboard using ctrl + cmd + spacebar!
Next Steps
Join us next time when we talk about collections and flow of control in our journey to learn Swift. Until then, Apple’s The Swift Programming Language is a great resource to bookmark and read through.
Happy Swifting!


