

Artificial intelligence is as trendy a topic as ever. The public’s interest in machine learning (ML) is booming, there’s no shortage of funding opportunities and we’re constantly witnessing ML transform the way we live.
Not too long ago objects like self-driving cars existed only in modern fiction. But now, thanks to the open source and libraries such as TensorFlow, the tools behind these cutting-edge technologies are available for everyone to use.
In this article, we’ll cover TensorFlow, a powerful library that has played a pivotal role in democratizing machine learning, and show you how to use it to implement an object detection system.
What Is TensorFlow?
TensorFlow is an open-source machine learning framework developed by Google’s artificial intelligence research division. The framework boasts a rich ecosystem for the training and deployment of machine learning algorithms, but its main focus lies in deep learning.
TensorFlow offers multiple layers of abstraction depending on the user’s needs or know-how. For instance, Keras, TensorFlow’s high-level interface, emphasizes simplicity and minimizes the technical overhead of training artificial neural networks. As such, Keras is a great choice both for those just getting started with deep learning but also for experts who want to develop quick prototypes.
By contrast, TensorFlow itself offers a lower-level control, which of course comes at the cost of increased complexity and a steeper learning curve. But on the other hand, you can use it to build virtually any type of artificial neural network architecture.
Whether we’re talking about simple models that recognize handwritten digits (also known as the “Hello World” of deep learning) to AI systems responsible for scientific breakthroughs (like AlphaGo), they’re all built in the same way using TensorFlow’s building blocks.
Keep reading to learn how you too can leverage the power of TensorFlow as we implement an object detection system.
Object Detection
Object detection is the computer vision task of finding objects on an image or a video and assigning each object into a class. Self-driving cars are perhaps the most interesting object detection application, with the technology helping a car to decide whether it should speed up, slow down, come to a halt or take a turn. By detecting and tracking pedestrians, traffic lights and other objects, the car builds an understanding of its surroundings and behaves accordingly.
The overarching goal of object detection and computer vision, in general, is to emulate or even surpass human performance at the same task. Measured by accuracy, machines have already been shown superior to humans at object recognition tasks like anomaly detection in medical imaging.
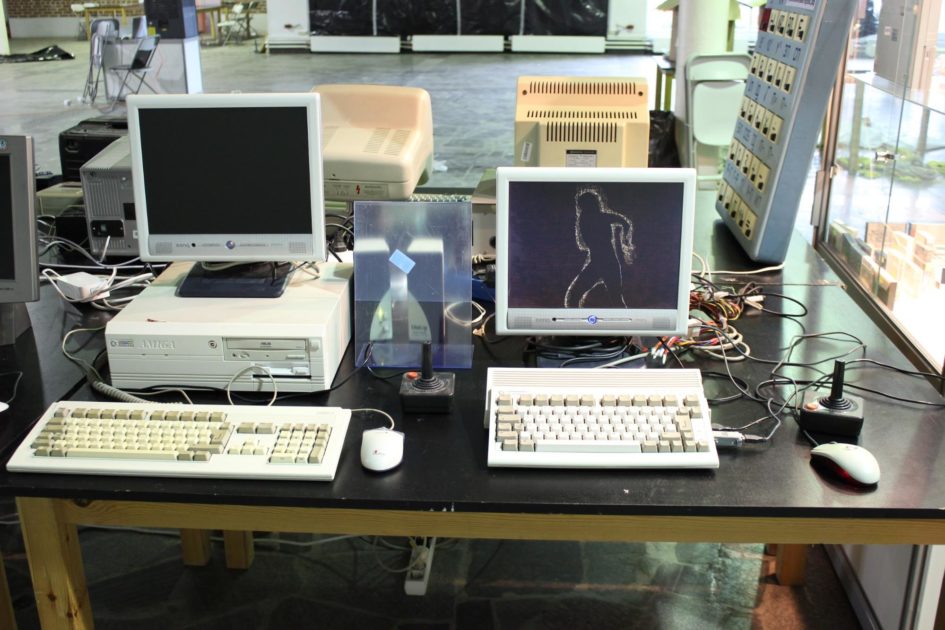
In this tutorial, we’ll use TensorFlow to load a pre-trained object detection model and run inference on the below image, which was taken by FAndrey on Flickr.
If you’re planning to follow along on your local machine, we’ve already prepared a tutorial on installing TensorFlow.
As an alternative to developing locally, we suggest using Google Colaboratory, a tool by Google Research made specifically for machine learning development. It will save you the hassle of managing Python’s virtual environment and installing packages since all libraries used in this tutorial come preinstalled on Google Colab. Likewise, Google Colab offers access to a GPU (and free of charge!), which greatly accelerates model training and inference.
Without further ado, let’s get started with the coding!
Object Detection in TensorFlow
We’ll start by importing the required libraries.
Imports and Helper Functions
# Mandatory imports import tensorflow as tf import tensorflow_hub as hub import numpy as np # We'll use requests and PIL to download and process images import requests from PIL import Image from PIL import ImageColor from PIL import ImageDraw from PIL import ImageFont from PIL import ImageOps |
Next, we’ll define helper functions to help us deal with the loading, transforming and processing of the images.
First, we’ll define a function that retrieves an image from a URL and returns it as an array. This kind of a function may be implemented in several different ways, and we’ve decided on using NumPy and PIL. These libraries are our go-tos whenever we need to perform transformations or computations on images.
def load_image(image_url): img = Image.open(requests.get(image_url, stream=True).raw) return img |
Next, we’ll define a function to resize an image. Doing so is optional and will not affect the model’s accuracy, but will greatly speed up computation times when working with large images.
def resize_image(img): # Resize image to be no larger than 1024x1024 pixels while retaining # the image's aspect ratio maxsize = (1024, 1024) img.thumbnail(maxsize, Image.ANTIALIAS) return img |
With our imports and helper functions in place, we can load an object detection module.
Load the Module
We’ll be using a pre-trained model from TensorFlow-Hub. We recommend using a Faster RCNN with Inception-ResNet. Let’s briefly digress to explain what these terms mean.
- Faster RCNN is a type of convolutional neural network (CNN) used for detecting the parts of an image that are likely to contain an object. Object detection systems do not scan every part of an image looking for an object, and instead employ algorithms to pinpoint the highest-likelihood regions. Faster RCNN is state-of-the-art architecture for proposing regions of interest. The “Faster” in its name is simply due to it being faster than its predecessor, Fast RCNN.
- Inception-ResNet is Google’s 2016 seminal image classification architecture. Though we’re interested in object detection rather than image classification, the knowledge of visual features learned by CNNs is transferable across computer vision tasks.
Despite these models being highly complex, using them in TensorFlow is a breeze even if you only have a vague idea of their theoretical underpinnings. We can load the module with the following two lines:
module_url = "https://tfhub.dev/google/faster_rcnn/openimages_v4/inception_resnet_v2/1" detector = hub.load(module_url).signatures['default'] |
Now, all that we need to do before we can use our detector is to load the image.
Load the Image
We’ll hard-code the URL of the image displayed above, but feel free to enter the URL of any other image you like.
IMAGE_URL = "https://farm1.staticflickr.com/6188/6082105629_db7abe41b9_o.jpg" img = load_image(IMAGE_URL) img = resize_image(img) |
We can make sure that we loaded the image properly by printing its shape:
numpy_img = np.asarray(img) print(numpy_img.shape) Output: (685, 1024, 3) |
Although images might look like two-dimensional grids, computers store them as three-dimensional objects. This is also the shape that our TensorFlow module expects as input. The first two dimensions describe the image’s height and width, while the additional dimension corresponds to color channels — red, green and blue — with each channel essentially storing only values specific to that particular color. Viewed this way, we can think of our image as three separate grids with a size of 685 by 1024 pixels with each pixel holding a value between 0 and 255.
Now that our image is stored in the proper format, we need to convert it into a native TensorFlow data type. Additionally, rather than have our pixels be expressed as integers in the range between 0 and 255, we’ll scale them so that they’re squashed between 0 and 1. This step is performed during training time to improve the stability of the model’s updates. However, it’s still a good idea to do it during inference to ensure that the image better matches the distribution of the training dataset.
We’ll perform these transformations with one function call each.
converted_img = tf.image.convert_image_dtype(img, tf.float32) scaled_img = tf.image.convert_image_dtype(img, tf.float32)[tf.newaxis, ...] |
We’re now ready to feed our image into the model.
Run Predictions
Running inference on an image is as simple as passing it as an argument to our detector and assigning the result to a variable.
output = detector(scaled_img) |
The output is a dictionary containing information such as the coordinates of the objects’ bounding box coordinates and labels and the model’s confidence as to whether the detected object indeed belongs to the assigned class. Let’s take a look at the ten objects for which our model has the highest confidence:
for obj, confidence in list(zip(output['detection_class_entities'], output['detection_scores']))[:10]: print("Detected {} with {:.2f}% confidence".format(obj, confidence)) |
And here is the output of the command:
Output: Detected 'Computer keyboard' with 0.95% confidence Detected 'Computer monitor' with 0.92% confidence Detected 'Computer monitor' with 0.92% confidence Detected 'Desk' with 0.90% confidence Detected 'Office building' with 0.88% confidence Detected 'Computer mouse' with 0.61% confidence Detected 'Desk' with 0.23% confidence Detected 'Computer monitor' with 0.22% confidence Detected 'Office building' with 0.19% confidence Detected 'Computer monitor' with 0.19% confidence |
Finally, we’ll borrow the draw_boxes function from TensorFlow’s object detection tutorial to draw bounding boxes around the detected objects.
# Draw the boxes img = draw_boxes(np.array(img), output["detection_boxes"], output["detection_class_entities"].numpy(), output["detection_scores"]) # Convert the image back into PIL.Image so we can display it img = Image.fromarray(img) img |
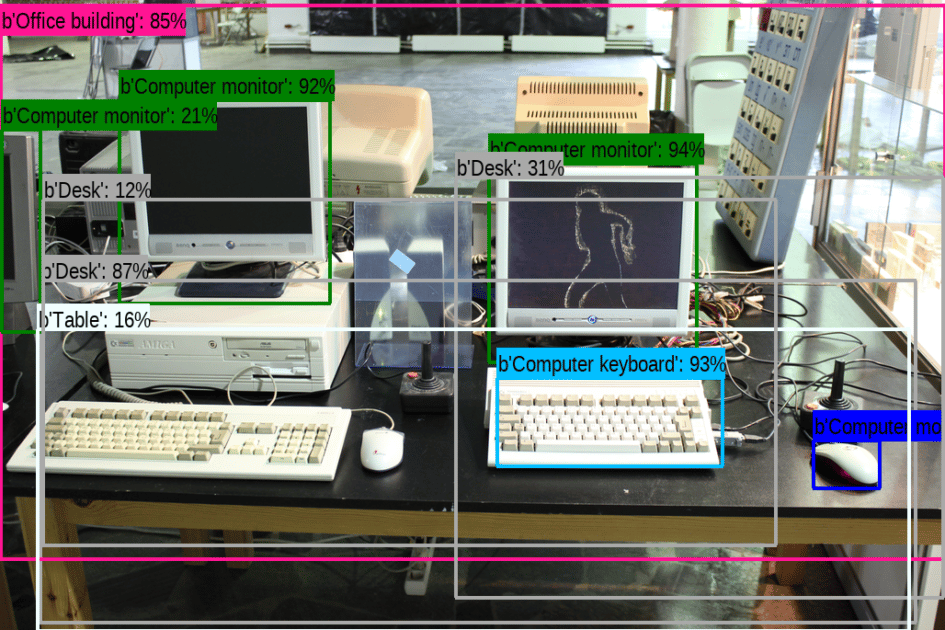
It looks like the module did a good job of detecting the image’s most salient objects. It even detected a third monitor sticking out at the image’s left hand side!
Fine-Tuning
The model we used above was trained using Open Images, a dataset consisting of about 15 million images of objects belonging to 600 different classes. This means that our system is limited to detecting only the 600 classes present in the dataset; the model has no way of detecting objects that it has not seen during training.
However, if you want your model to detect a class that it has not seen during training, say garden gnomes, you do not need to teach it to see all over again. As we mentioned earlier, a lot of the model’s knowledge is transferable across different tasks — visual features learned on image classification can be used for object detection as well. Therefore, if you want your model to be able to detect garden gnomes, you’d just have to show it a few images of garden gnomes. This is known as fine-tuning.
To fine-tune a model, we simply load the pretrained module and add a new trainable layer on top of it. Check out TensorFlow’s tutorial for more information on fine-tuning.
Become a Machine Learning Engineer
In this article, we used TensorFlow to implement an object detection system. We hope that we’ve demystified the process of using pre-trained machine learning models with TensorFlow.
Want to make a career out of this?
Check out our Machine Learning Nanodegree program, we’ll teach you what you need to know to become a machine learning engineer. You’ll start with the fundamentals of software engineering and machine learning, before finishing off with a capstone project where you’ll get to apply your new skills.


