Last Updated on October 23, 2024
Working as a data scientist, I often find myself having to gather data from certain websites. Some of this data, like tables found on government websites, needs to be periodically updated and having to manually refresh your data from the webpages can be time consuming. Luckily, Python provides some tools that allow you to easily interact with web browsers. In this article we will be discussing the Python library pyautogui and how it can be used to automate data collection processes.
Pyautogui
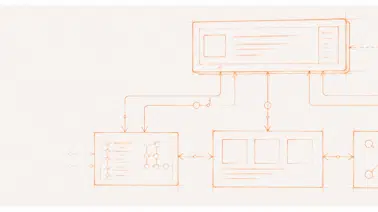
Python’s pyautogui is a package that allows users to create scripts that can simulate mouse movements, click on objects, send text, and even use hotkeys. While not as elegant a solution as Selenium, pyautogui can be used to bypass systems that put up blocks against automated browser use. In this article, I will show you the basics of pyautogui through a web scraping example. We will be using pyautogui to create a Python script that will open a web browser, navigate to a specific Wikipedia article, and copy and paste the data from a table on that web page.
Installing pyautogui
If you do not already have the package installed, simply open a command prompt or terminal and perform a pip install (check out Udacity’s Intro to Python program for a refresher on Python basics).
(base) C:\Users\blars>pip install pyautogui
import pyautogui as pg
import time
Note that we will also be using the time package during this lesson, so if you do not have that, you will need to install it as well.
Failsafe
Pyautogui will take control of your mouse and keyboard. If for some reason you need to stop the program from running, simply use your mouse to force your cursor to the upper left corner of the screen. This will activate failsafe mode and the program with stop.
MouseInfo()
Let’s start with a useful utility found in pyautogui, mouseInfo() brings up a useful GUI:
pg.mouseinfo()
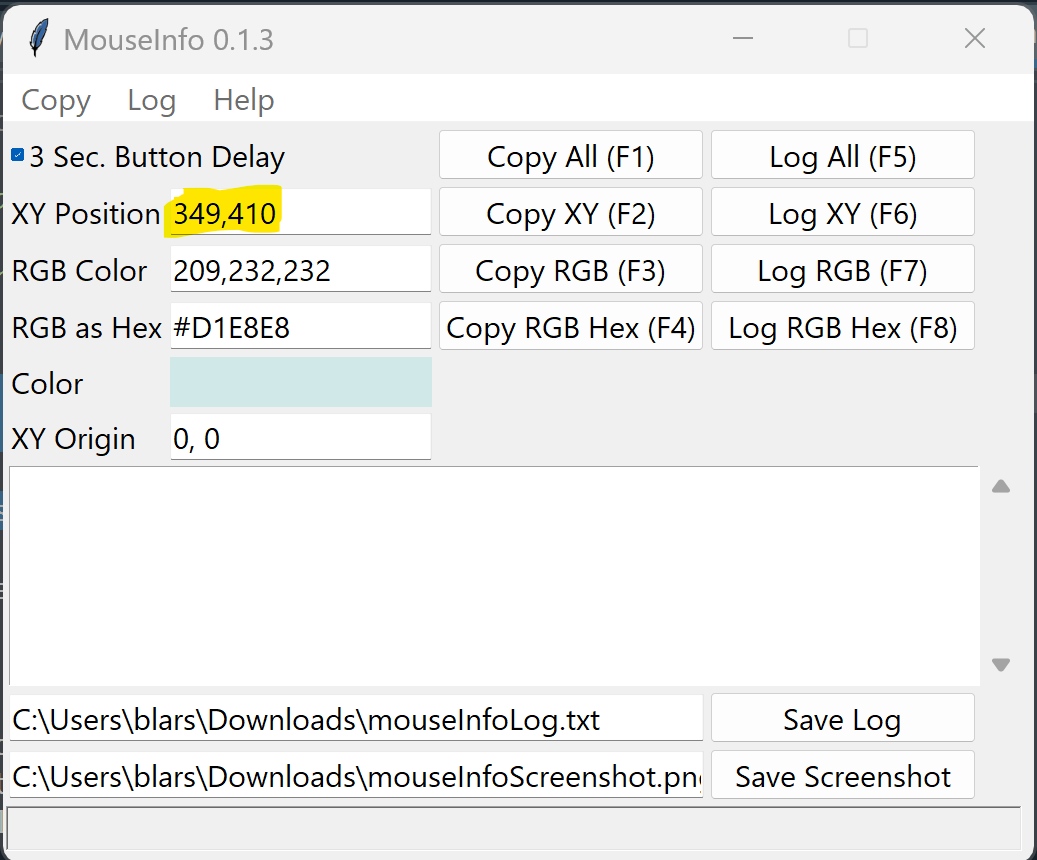
While this provides a lot of useful information, for this lesson we are to focus on XY Position. You will notice as you move your mouse across the screen the XY Position changes. This is providing you with the exact coordinates of your current mouse location.
Pick a spot on your screen, move your mouse there and note the XY Position. I am going to pick the search box on my taskbar.
My XY coordinates are 1101, 2090. Using the moveTo() method from pyautogui, I can have Python tell my mouse to move to the search box. **Note your XY will most likely not match mine. Do not try to just copy my code, you will need to replace my XY coordinates with your own.
pg.moveTo(1101,2090, duration = 1)
Note that duration = 1 means I want the mouse movement to take 1 sec. Without this argument the mouse cursor just jumps to the next location. Having it take a second or two is helpful, not only for you watching the task play out, but it also looks like a real human is operating the mouse and not a bot that might get blocked by a website’s security features.
Click() and Write()
pg.click(1101,2090, duration = 1)
pg.write('Chrome')
time.sleep(2)
Using the same coordinates of the search box, now use the click() function to click on this spot. clickI) will use whatever your default mouse button is (mine is set to left). If you want to differentiate, there are leftClick() and rightClick() methods available.
Next, use the write() method to type the word Chrome in the search bar.
Then time.sleep(2) to allow the computer two seconds to respond.
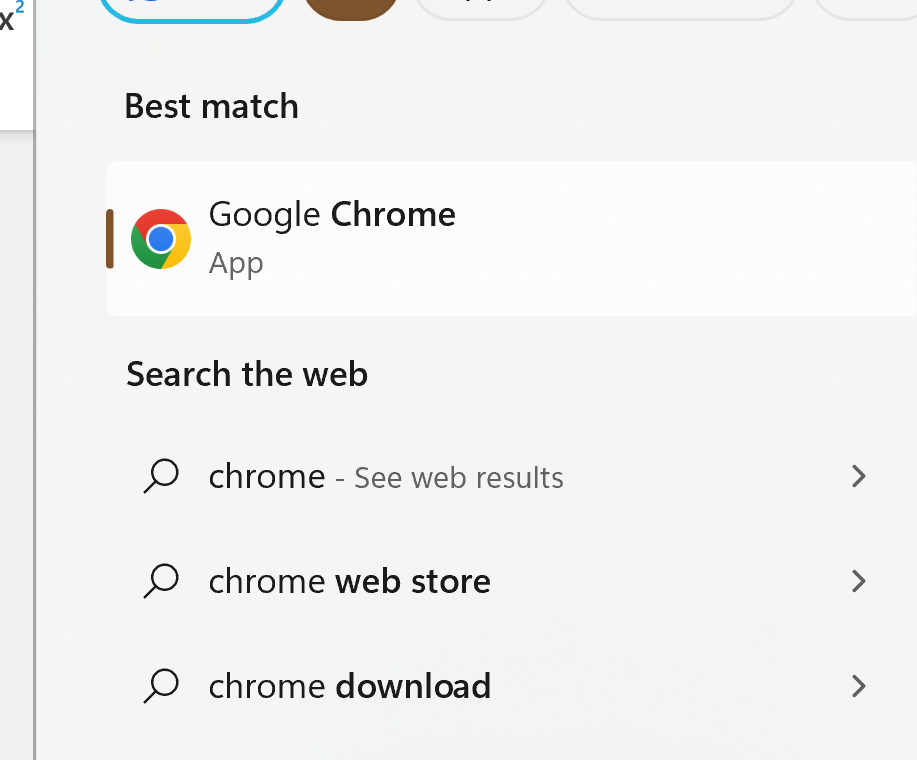
The search bar opens up and Google Chrome is the best match. Using mouseInfo() find the XY coordinates of the Google Chrome icon in the search bar and send a click() method to go and click on it.
pg.click(1188,539, duration = 1)
time.sleep(2)
Note: You do not need to use moveTo() first. Click() will move to the XY coordinates provided and click on it.
Press()
pg.click(641, 137, duration = 1)
pg.write('en.wikipedia.org')
pg.press('enter')
time.sleep(4)
Next use the coordinates of the Chrome browser’s search bar to send a click(). Then use write() to enter en.Wikipedia.org. After, use a new method press() to simulate hitting the Enter key.
Note the use of time.sleep(4) to allow the webpage time to render.
Scroll()
pg.click(1286,344, duration = 1)

pg.write('List of Microsoft Windows Versions')
time.sleep(1)
pg.press('enter')
time.sleep(2)

pg.scroll(-4650)
First click() on the search bar for the main Wikipedia page and then use write() to send the text “List of Microsoft Windows Versions”. Use the press() method to simulate the enter key.
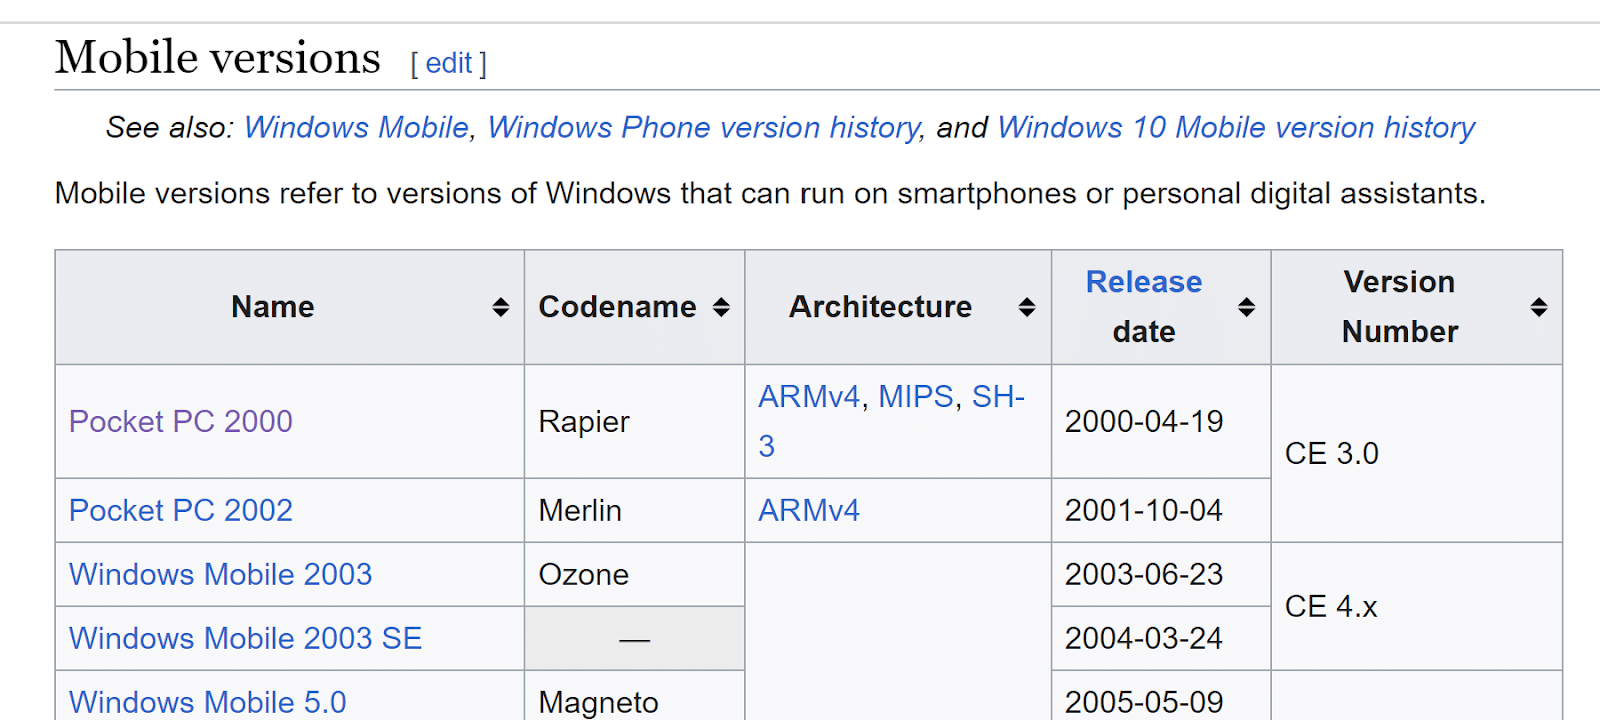
Now use a new method scroll() to mimic using the scroll bar to move the page down. You will have to play around a bit to find the proper value for your scroll.
For this example, the goal is to scroll down to the mobile versions table about a quarter way down the page.
dragTo() hotkey()
Next, use two new methods – dragTo() and hotkey() to copy the information from this table.
pg.moveTo(850,421, duration =2)
pg.dragTo(2473,1981, duration=2, button = 'left')

pg.hotkey('ctrlleft', 'c')
Use moveTo() to go to the XY coordinate just to the left of “Pocket PC 2000”. Note, I am using moveTo() and not click() here as I do not want a mouse click yet. I want to wait for the dragTo() method to perform the mouse click.
The dragTo() method can be used to simulate holding down the mouse button we designate (button = ‘left’ in this example) and dragging the mouse down to the bottom right. This is the same effect as clicking and dragging the mouse across the table contents where the text is highlighted.
With the text selected, we can use the method hotkey() to send a hotkey command. In this case we are sending Left CTRL and C (Ctrl-C = Copy).
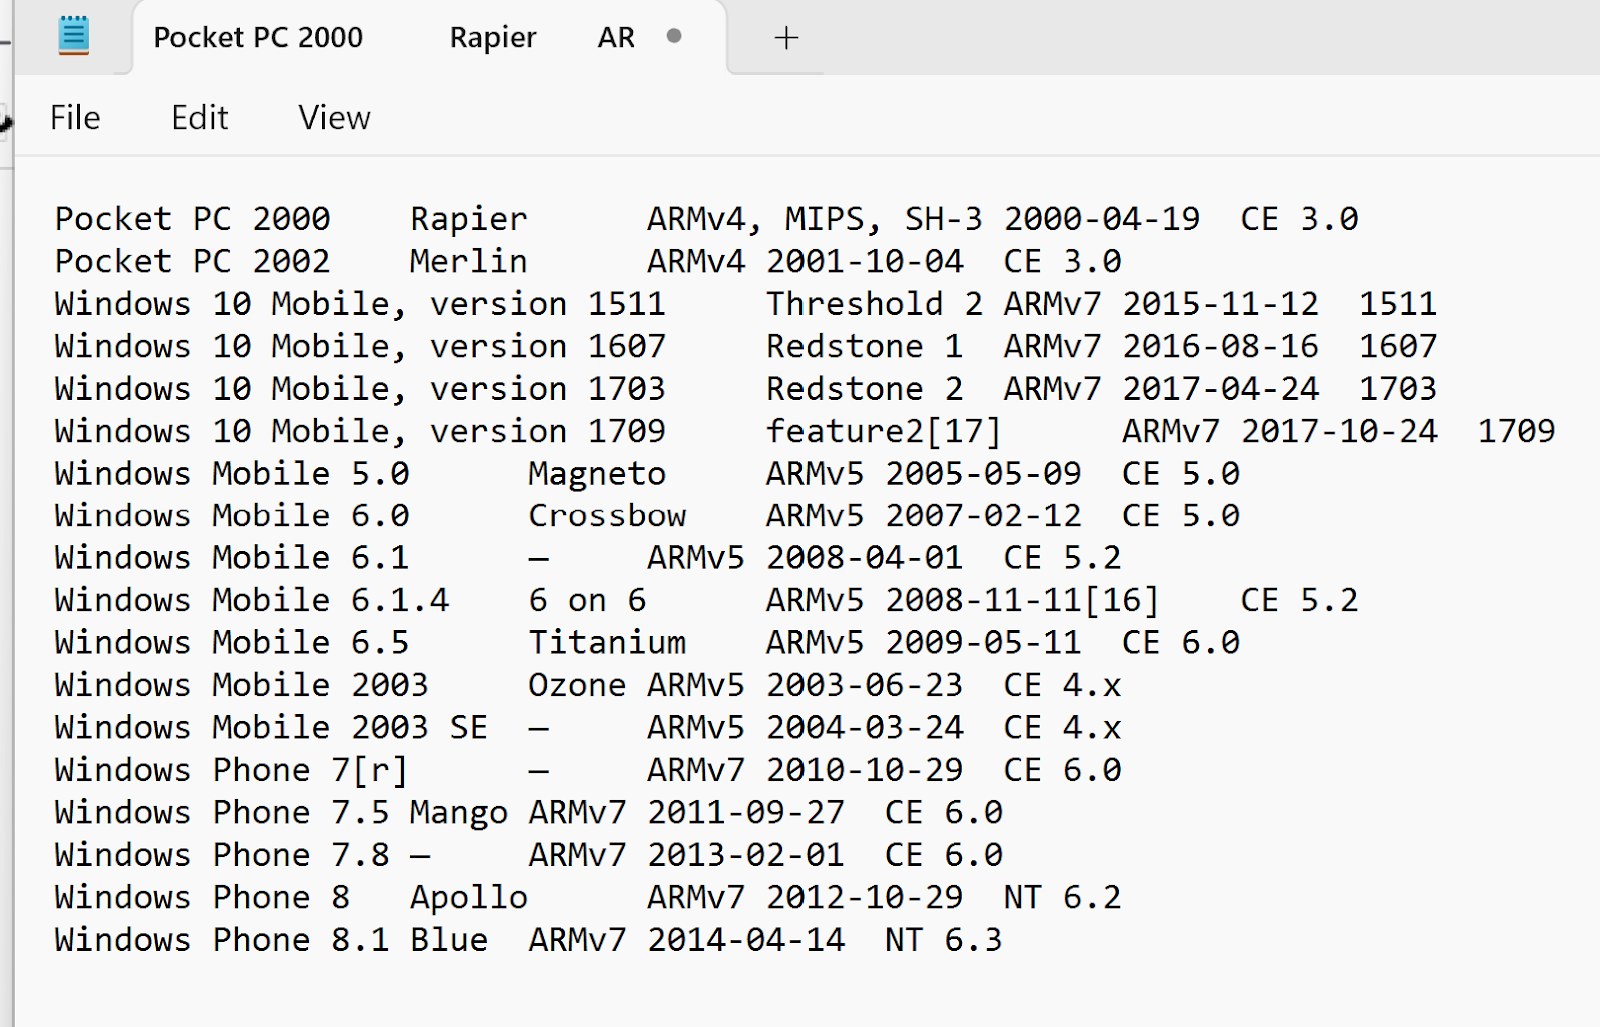
Paste to Notepad
pg.moveTo(1101,2090, duration = 1)
pg.click(1101,2090, duration = 1)
pg.write('notepad')
time.sleep(2)
pg.click(1188,539, duration = 1)
time.sleep(2)

pg.hotkey('ctrlleft','v')
Using the same method we used to open Chrome, send pyautogui to the taskbar search window, type “Notepad” and then click the notepad icon from the search results.
Once Notepad is loaded, send the CTRL V hotkey combination to paste the table contents.
Conclusion
Pyautogui is not my go to. For most of my web scraping and web browser interactions, I use requests or selenium. However, it seems more and more websites are adding bot prevention methods that make using automated tools like selenium difficult, if not impossible. Pyautogui fills that gap. Since it is based on simulating mouse movements and keystrokes, it is difficult for websites to know it is not a human operating the browser.
Take your Python skills even further by enrolling in Udacity’s Introduction to Python Course or the Intermediate Python Nanodegree program.