This blog was last updated on July 13, 2021.
Python is one of the fastest-growing programming languages across the world. Given its incredible versatility, Python can solve many types of software problems. With that said, it shouldn’t come as a surprise that Python is an indispensable tool for data specialists, analysts, and machine learning engineers, among many other professionals.
In this article, we’ll walk you through writing your first Python application. In doing so, we’ll create a simple Python program covering rudimentary Python syntax before connecting the program to a database. Let’s get started.
Why Learn Python
Python is a powerful and in-demand programming language. In recent years, the language has been steadily climbing RedMonk’s “annual programming language rankings,” a list based on rankings from GitHub and StackOverflow. As of the January 2021 rankings, Python was in second place — one spot higher than the year prior.
There are many reasons for Python’s success, including the language’s remarkable versatility and simplicity. Python is a great programming language to learn first due to its intuitive syntax that resembles that of the English language and a relatively shallow learning curve.
Although Python has established itself as the standard language of artificial intelligence and data science, it’s also widely used in web development, scientific computing and software development. What’s more, Python boasts a vast community of collaborators who constantly enrich its already vast ecosystem and keep its many libraries up-to-date.
All of these reasons make Python a great starting point for any aspiring programmer. Without further ado, let’s start writing our first Python program.
Setting Up Python
To be able to run the code in this article, you’ll need to have Python 3 installed on your computer. To check whether you already have Python 3 on your machine, follow the instructions below depending on your operating system.
Windows
- Open the Search menu by clicking the magnifying glass icon next to the Start menu. Type “cmd” into the search box. The “Command Prompt” option will come up as one of the search results. Click on “Command Prompt”. A command prompt window should open on your screen.
- In the command prompt, type in “python” and press Enter.
- If you already have Python installed, you’ll be greeted with a Python prompt. If you see a Python prompt, and the version of Python is 3 or above, you can skip the rest of the installation steps and proceed directly to the Creating Our First .py File section.
- If you don’t have Python installed, or if you have Python version 2 installed, you’ll need to install Python by following the next steps.
- Navigate to the official Python Downloads page and click the “Download Python” button. This will download the installer for the latest stable Python version to your computer. Run the installer.
- Once the installer opens, check the “Add Python to PATH” option and click Install Now. Leave all other options to their default values.
- After the installer has finished running, open a new Command Prompt window through the search bar as you did before, and type in “python”. You should now see a full Python 3 prompt.
In an active Python prompt, you can type in “exit()” to close it and go back to the command line.
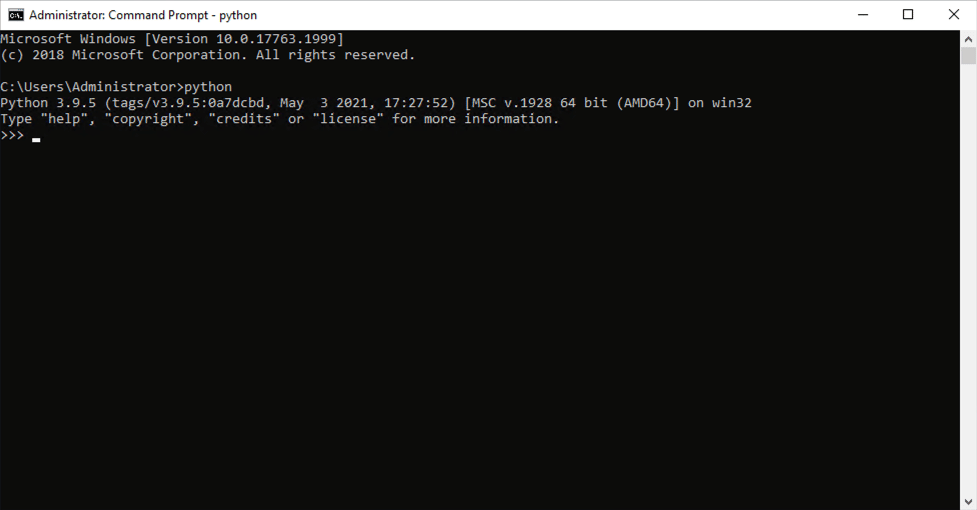
A working Python 3 prompt on Windows.
macOS
- Open the Applications menu and navigate to the Utilities sub-folder. Under Utilities, click on Terminal. A terminal window will open.
- In the terminal window, type in “python”.
- You will likely see a Python 2 prompt that looks similar to the screenshot below. If that’s what you see, proceed to step 3.
- You might also see a Python 3 prompt — that will happen if you already have Python 3 installed and configured. If you see a Python 3 prompt, great! You don’t need to do anything else. You can skip the rest of the steps here and move on to the Creating Our First .py File section.
- You can type in ”exit()” and press Enter to quit the Python prompt and go back to the command line.
- In the same terminal window, type in “python3”.
- You will likely get an error message with the text “command not found: python3”. If that’s the case, move on to step 4.
- You might also see a Python 3 prompt — that will happen if Python 3 is already installed on your machine under the “python3” name. In this case, you can skip the rest of the steps here, but you’ll have to use “python3” in places where we use “python” in this article.
- If you don’t have Python 3 installed yet, navigate to the official Python Downloads page and click the Download Python button. An installer will get downloaded to your computer. Open it and follow the installer’s instructions.
- Once the installation is finished, open a new terminal window and type “python”. You should now see a Python 3 prompt.
- If you are still getting the Python 2 prompt, don’t worry — Python 3 is likely installed under the “python3” executable. Type in “exit()”, press Enter, and type “python3” in the command line.
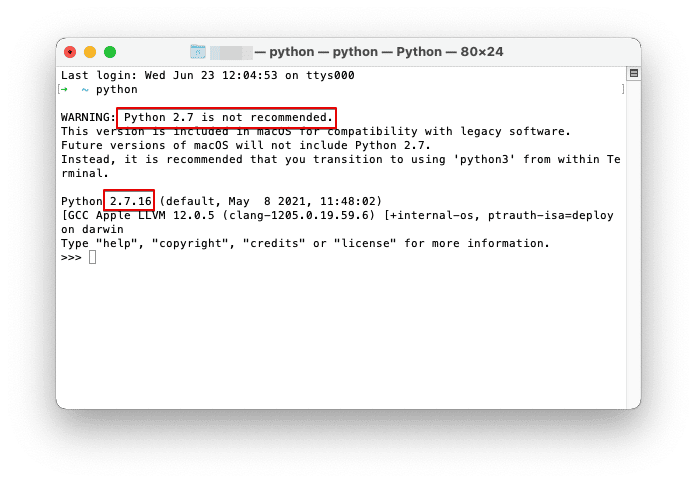
The Python 2 prompt on macOS.
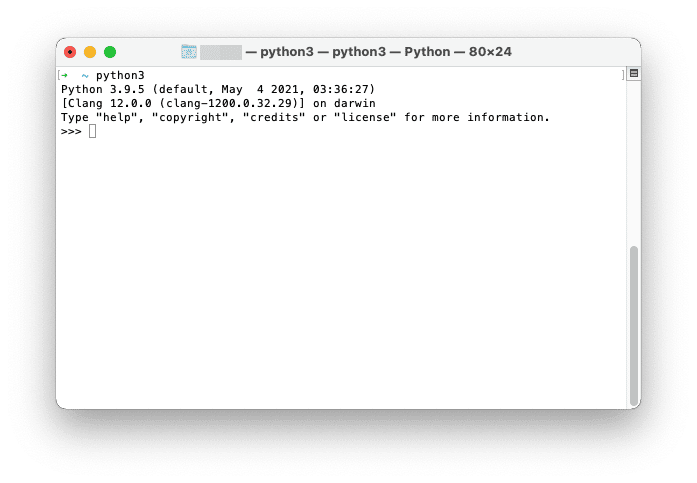
The Python 3 prompt that we’re looking for on macOS.
Linux
- Open the terminal window and type in “python”.
- If you are getting a Python 3 prompt, you can stop here and proceed to the Create Our First .py File section.
- If you are getting an error or a Python 2 prompt, you will need to install Python 3.
- To install Python 3, install the packages mentioned in the Python Download guide for your Linux distribution.
- Open a new terminal window and type in “python”.
- If you are still getting a Python 2 prompt, try typing in “python3”. If that results in a Python 3 prompt, you can just use that in the following sections.
- If you are getting a Python 3 prompt, you are good to go.
- You can type in “exit()” and press Enter in the Python prompt to quit it and go back to the command line.
Creating Our First .py File
With Python installed, we can now write and run our first Python program.
All Python files end with the “.py” extension. You can create, edit, and save Python files with any text editor.
To create your first Python file, navigate to the folder that you would like to create your file in and create a file called test.py. Next, open this file up in a text editor and type in the following code:
print("Hello, World!") |
Save your file, and in the terminal, navigate to the file’s location. Then, run the file by calling python test.py. This line instructs your Python interpreter to execute the command you just wrote. You should see the correct output:
Hello, World! |
Note: remember to use “python3” instead of “python” if needed to get to the Python 3 executable. Some of the examples will not work with Python 2.
This hello-world program works, but let’s make it more interesting.
To start, let’s add a variable and a conditional statement to our program. We want the variable to store our first name — that we’ll provide to the program dynamically, and the conditional statement to check if the name provided matches the one we defined in the program. Depending on the result of the conditional statement, the program will print out a greeting message or ask for another name.
Note that, unlike many other languages, Python uses whitespace indentation as a delimiter for code blocks instead of the traditional curly braces or keywords. This allows Python to have extremely readable code. Keep this in mind as you write your program. It will help you avoid issues caused by missing line breaks or indentation.
name = "Keenan" if name == "Keenan": print ("Hello,", name) else: print ("Oh, well, what is your name then?") |
Let’s run our program and see the output:
Hello, Keenan |
As the next step, let’s edit the name variable to store another name to see whether our condition is really working:
name = "Brian" |
If you run the program again, you should see the following output:
Oh, well, what is your name then? |
As expected, since the two names are not the same, the program executes the statement captured by the “else” branch of the condition.
Writing a Simple Function
Let’s take our basic program logic and turn it into a function.
Our function will accept a single argument called “name.” The program will then ask whether the provided name is the name of the person interacting with the program. The user may answer affirmatively with a “yes,” which will prompt the program to print a greeting message. Any other answer will be interpreted as negative and the program will thus print another message.
This function might be implemented in the following way:
def checkName(name): answer = input("Is your name " + name + "? ") if answer.lower() == "yes": # lower() turns the answer into lowercase print("Hello,", name) else: print("We're sorry about that.") checkName("Keenan") |
Let’s examine this new program component by component.
We begin by defining the function (if this part is confusing, check out our article on function definition in Python). In short, Python functions are prefaced using the def keyword followed by the function’s name; in this example, we’ll call our function “checkName”.
Inside the function, we declare a variable “answer”. Using Python’s “input” function, we ask the user whether the name being printed out is theirs and the user provides their answer by typing it into the terminal. We store the answer into a variable and perform the conditional check.
Note that the conditional now calls the “lower()” method on the answer. We use this method simply to ensure that the answer is lowercase so that it’s always evaluated identically regardless of how the user types it in — whether as “yes,” “YES,” “yEs” or “Yes.”
At the end of the file, we call the function, passing our name as the parameter. With this function call in place, we should be able to run our script and walk through both conditionals:
Is your name Keenan? No We're sorry about that. |
Note: if you are getting a NameError with the message “name ‘yes’ is not defined”, you are running the program using Python 2 instead of Python 3. Make sure that you have installed Python 3 and are using it.
Let’s take our function a step further and allow our user to enter their name even if it’s not the one the program expected. Implementing such functionality will take only one additional line and one changed line.
def checkName(name): answer = input("Is your name " + name + "? ") if answer.lower() == "yes": print("Hello,", name) else: new_name = input("We're sorry about that. What is your name again? ") print("Welcome,", new_name) checkName("Keenan") |
The new changes are right after the “else” statement. Instead of apologizing to the user, the program now asks for the user’s name and greets them. Running the program should look something like this:
We're sorry about that. What is your name again? Lisa Welcome, Lisa |
Having written a simple function and used variables, user input and conditional statements, let’s connect to a simple SQLite database to store and retrieve information.
Creating and Accessing Database Tables
SQLite is a simple database that stores records in a file on disk. It’s got fewer features than production-grade database systems like MySQL and PostgreSQL, but SQLite is an easier database to start learning with.
Note: Most of the feature differences between SQLite and other systems are in the areas of complex data types, performance, and reliability. Such functionality is valuable for production systems, but we aren’t going to cover it in this article. The SQL syntax that we’re using in the examples in this article is very similar to what you can use with MySQL or PostgreSQL.
Creating a Table and Inserting Our First Record
To begin working with SQLite, we’ll open the Python interpreter and create a new database called “example.db”. Then, we’ll create a new table in our database, called “users”, and add a record for Keenan.
We start by importing the “sqlite3” library:
$ python Python 3.9.5 (default, May 4 2021, 03:36:27) [Clang 12.0.0 (clang-1200.0.32.29)] on darwin Type "help", "copyright", "credits" or "license" for more information. >>> import sqlite3 |
Next, we select the database to connect to. Because SQLite is file-based, the name we specify in this step is the name of the file where all the data will be stored. SQLite will create the file if it doesn’t exist:
>>> db = sqlite3.connect('example.db') |
After we’ve selected the right database, we’ll need to define a database cursor. This cursor will help us send queries to the SQLite database and process their results:
>>> cursor = db.cursor() |
We can now use the cursor to run SQL queries against our “example.db” database.
Let’s create our desired “users” table with two values for each record: an ID number, and a first name. The ID number will serve as a primary key, meaning that each user record will have a different identifier, to help us distinguish them. To make sure there are no errors creating the table, we’ll run another query first — to drop any existing versions of the table with the same name:
>>> cursor.execute("DROP TABLE IF EXISTS users") >>> cursor.execute("""CREATE TABLE users( id INTEGER PRIMARY KEY, firstname VARCHAR )""") |
At this point, we have a “users” table that we can start inserting values into. Time to add our first record, for Keenan:
>>> cursor.execute("INSERT INTO users (firstname) VALUES ('Keenan')") |
We will now use the “commit” function to ensure that all changes have been saved to our new “users“ table, and will then close our connection to the “example.db” database:
>>> db.commit() >>> db.close() |
Here is the full sequence of the commands we’ve run just now, all in one snippet:
$ python Python 3.9.5 (default, May 4 2021, 03:36:27) [Clang 12.0.0 (clang-1200.0.32.29)] on darwin Type "help", "copyright", "credits" or "license" for more information. >>> import sqlite3 >>> db = sqlite3.connect('example.db') >>> cursor = db.cursor() >>> cursor.execute("DROP TABLE IF EXISTS users") >>> cursor.execute("""CREATE TABLE users( id INTEGER PRIMARY KEY, firstname VARCHAR )""") >>> cursor.execute("INSERT INTO users (firstname) VALUES ('Keenan')") >>> db.commit() >>> db.close() |
We now have a SQLite database in the “example.db” file in our current directory, and it should contain a single record for Keenan. In the next section, we’ll retrieve that the data is stored correctly.
Retrieving a Database Record
After we’ve inserted our first record, it’s a good idea to verify that the data got stored correctly. To query the contents of the database, we’ll use the Python interpreter once again.
We start by importing the “sqlite3” library, the same way we did in the previous section. We then select the “example.db” database and create a cursor to help us send queries to it:
$ python Python 3.9.5 (default, May 4 2021, 03:36:27) [Clang 12.0.0 (clang-1200.0.32.29)] on darwin Type "help", "copyright", "credits" or "license" for more information. >>> import sqlite3 >>> db = sqlite3.connect('example.db') >>> cursor = db.cursor() |
We can now use the cursor to execute a SQL Select statement to get all users from the “users” table and print their data one by one. Because the cursor can contain multiple results, we will need to iterate over them using the Python “for” statement:.
>>> for row in cursor.execute('SELECT * FROM users ORDER BY id'): ... print(row) ... (1, 'Keenan') |
Note: when entering the commands from this snippet, make sure that you type in four spaces before the “print” statement. Indentation of code using spaces helps the Python interpreter understand how the “print” statement relates to the “for” statement above.
The output shows us that the record for Keenan that we entered in the previous section is present in the database and that its user ID is 1.
It’s interesting to note that we didn’t specify which identifier we want Keenan to get — the database decided that for us due to our use of the Primary Key statement on the “id” column. When we define a numeric column and make it a primary key, the database will pick a higher ID number for each new record.
With the database created and working, and with the first user record correctly stored, we can now upgrade our “checkName” function to return the person’s ID from our database if there is a record for their name.
Using Database Records in Our Python Program
Let’s have a look at how we could access database records in our “test.py” file. We’ll update the “checkName” function code to check whether the person’s name is already in our SQLite database. If it is, we will greet them, and if it’s not, we will tell them that that they are not in the database yet:
import sqlite3 def checkName(): name = input("What is your name?\n") # connect to the database db = sqlite3.connect('example.db') cursor = db.cursor() # query all user IDs where firstname matches the user's input cursor.execute("SELECT id FROM users WHERE firstname = ?", (name,)) # fetch the first result of the query above result = cursor.fetchone() # if the result is not empty, we've found a match if result and len(result) > 0: print("Hello,", name, ", your user ID is", result[0]) # otherwise, we haven’t found this user by name else: print("We couldn't find your user ID in the system,", name) db.close() checkName() |
Let’s run our new program and see what happens when we enter a name that isn’t yet present in the database:
$ python test.py What is your name? Breanna We couldn't find your user ID in the system, Breanna |
And now let’s try this for Keenan who already has a database record:
$ python test.py What is your name? Keenan Hello, Keenan , your user ID is 1 |
We get the message with Keenan’s ID back, as expected.
Learn To Code With Udacity
Congratulations, you’ve just built a simple Python application that’s communicating with your database, storing variables, getting user input and running conditional statements.
You could expand your program by asking the user their name and storing it in the database if there isn’t a record for them already. You could also tweak the “print” statements to clean up unnecessary whitespace in the program’s output.
If you want to learn more about how to write a Python application, consider enrolling in a Udacity Nanodegree program, where you’ll complete hands-on projects and get valuable career support. We offer an Introduction to Programming program, which is great for beginners to HTML, CSS, JavaScript and/or Python. If you’re particularly interested in Python, check out our Python for Data Science program, which provides a more specialized approach to mastering the language.
Enroll in our Introduction to Programming Nanodegree program today!